Ansible Intro 1
Link and Tools: 7
1. Ansible 7
2. SSH 8
Auth 8
Setup Guide 8
3. Git Repo 11
4. Running AD-HOC commands 11
Troubleshoot Commands 12
5. Running elevated ad-hoc Commands 12
6. Ansible Playbook 13
7. Condition - When 13
8. Improving your Playbook 15
Consolidating 15
Consolidating-2 15
9. Targeting Specific Nodes 16
10. Tags 18
How to run 19
11. Managing Files 20
Why/Use case 20
12. Managing Services 21
13. Adding Users & Bootstrapping 22
Result 23
14. Roles 24
15. Host Variables 25
16. Templates 27
Ansible Intro
Ansible
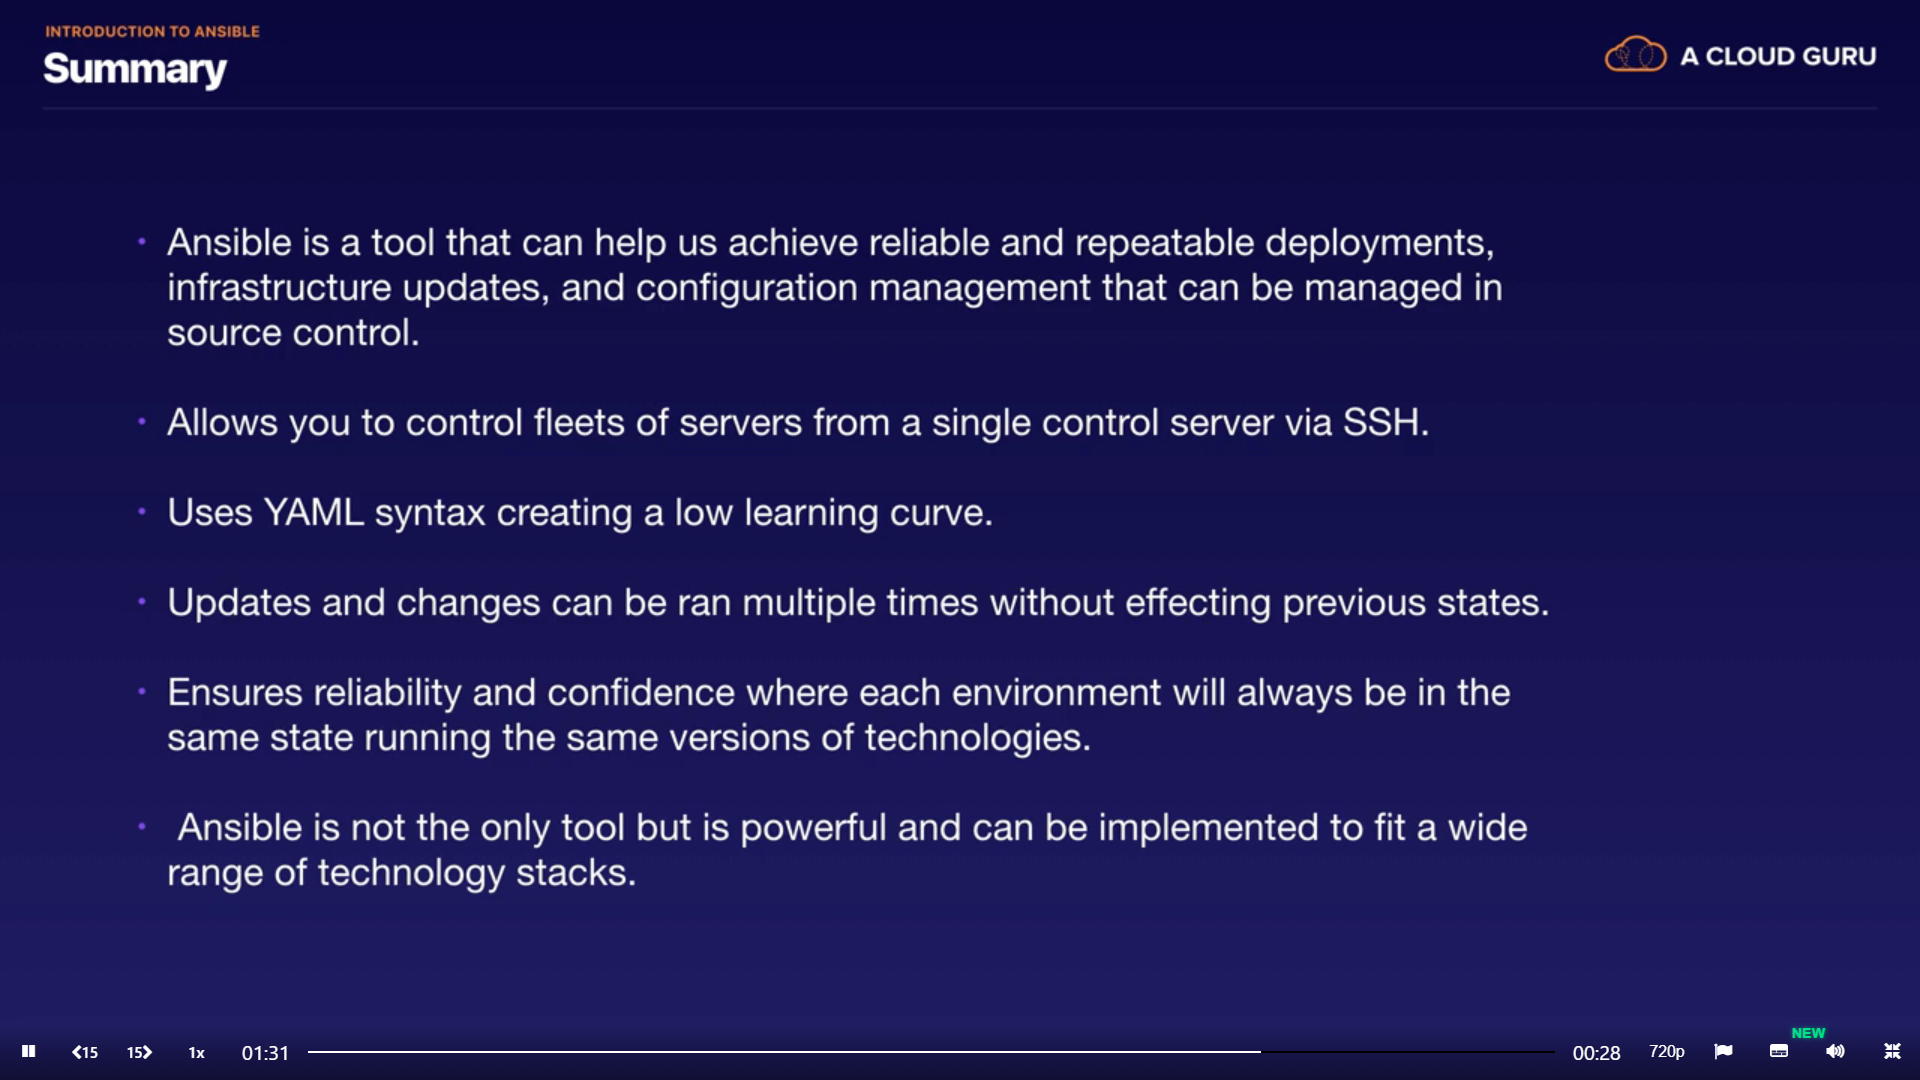
Tools that make DevOps engineer life easier by Allowing us to achieve reliable and repeatable deployment, infrastructure updates, and configuration management, using Ansible that allows us to script out changes and manage it all within source control
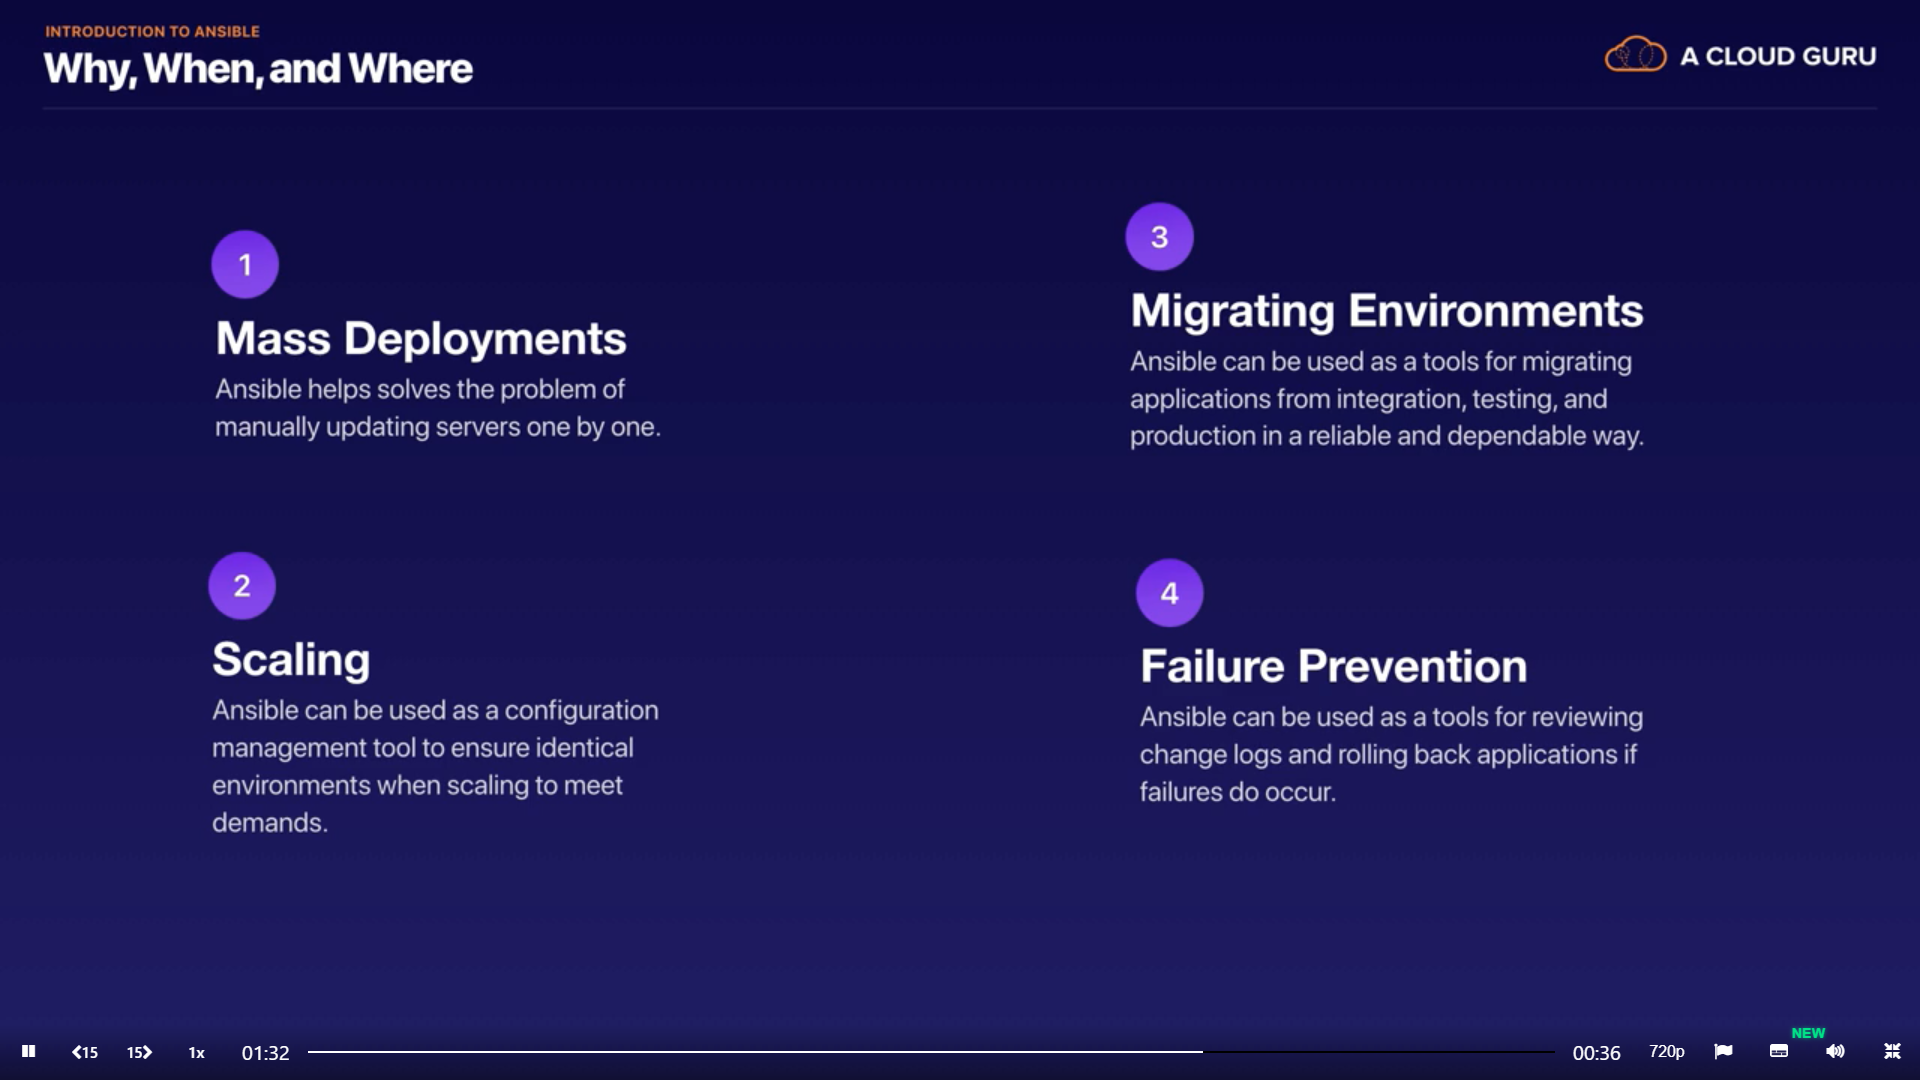
Why when and where
- Mass deployment
- Scaling
- Migrating environments
- Failure prevention
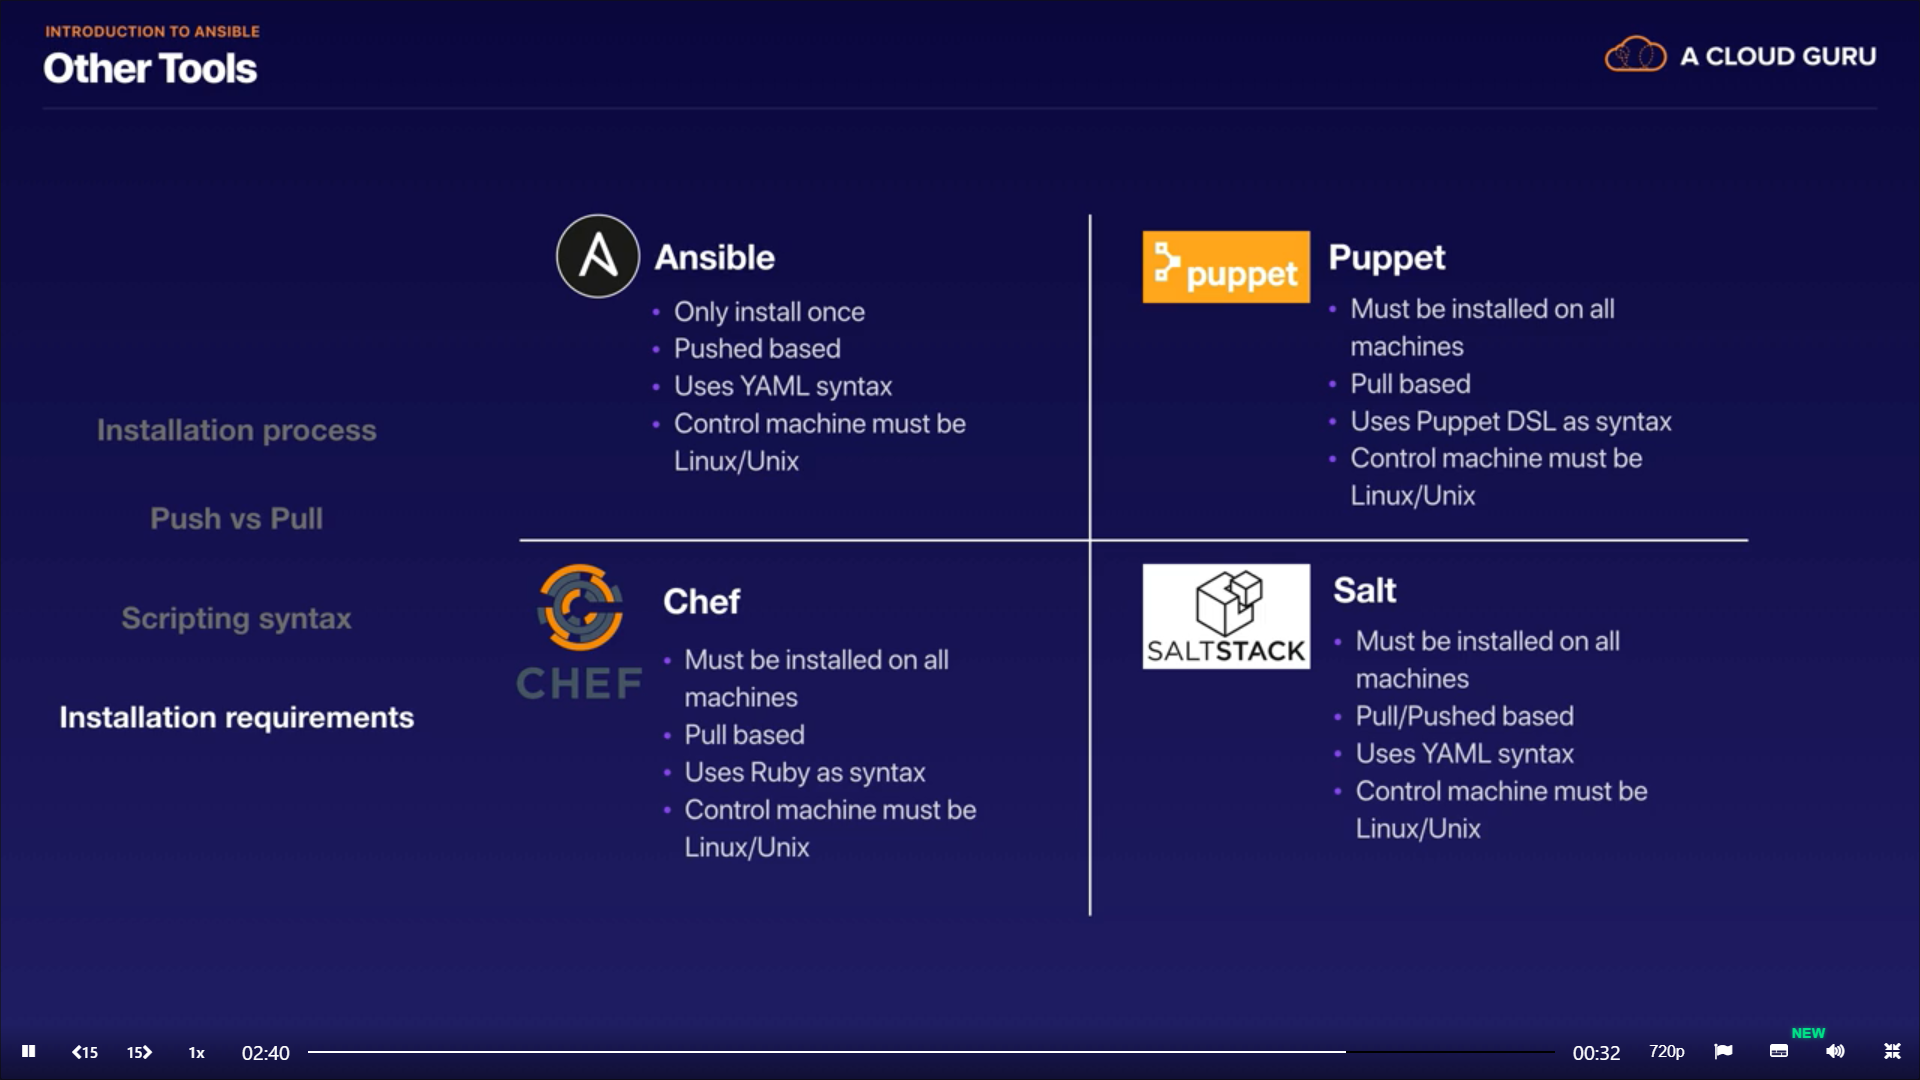
Tools comparison

Summery
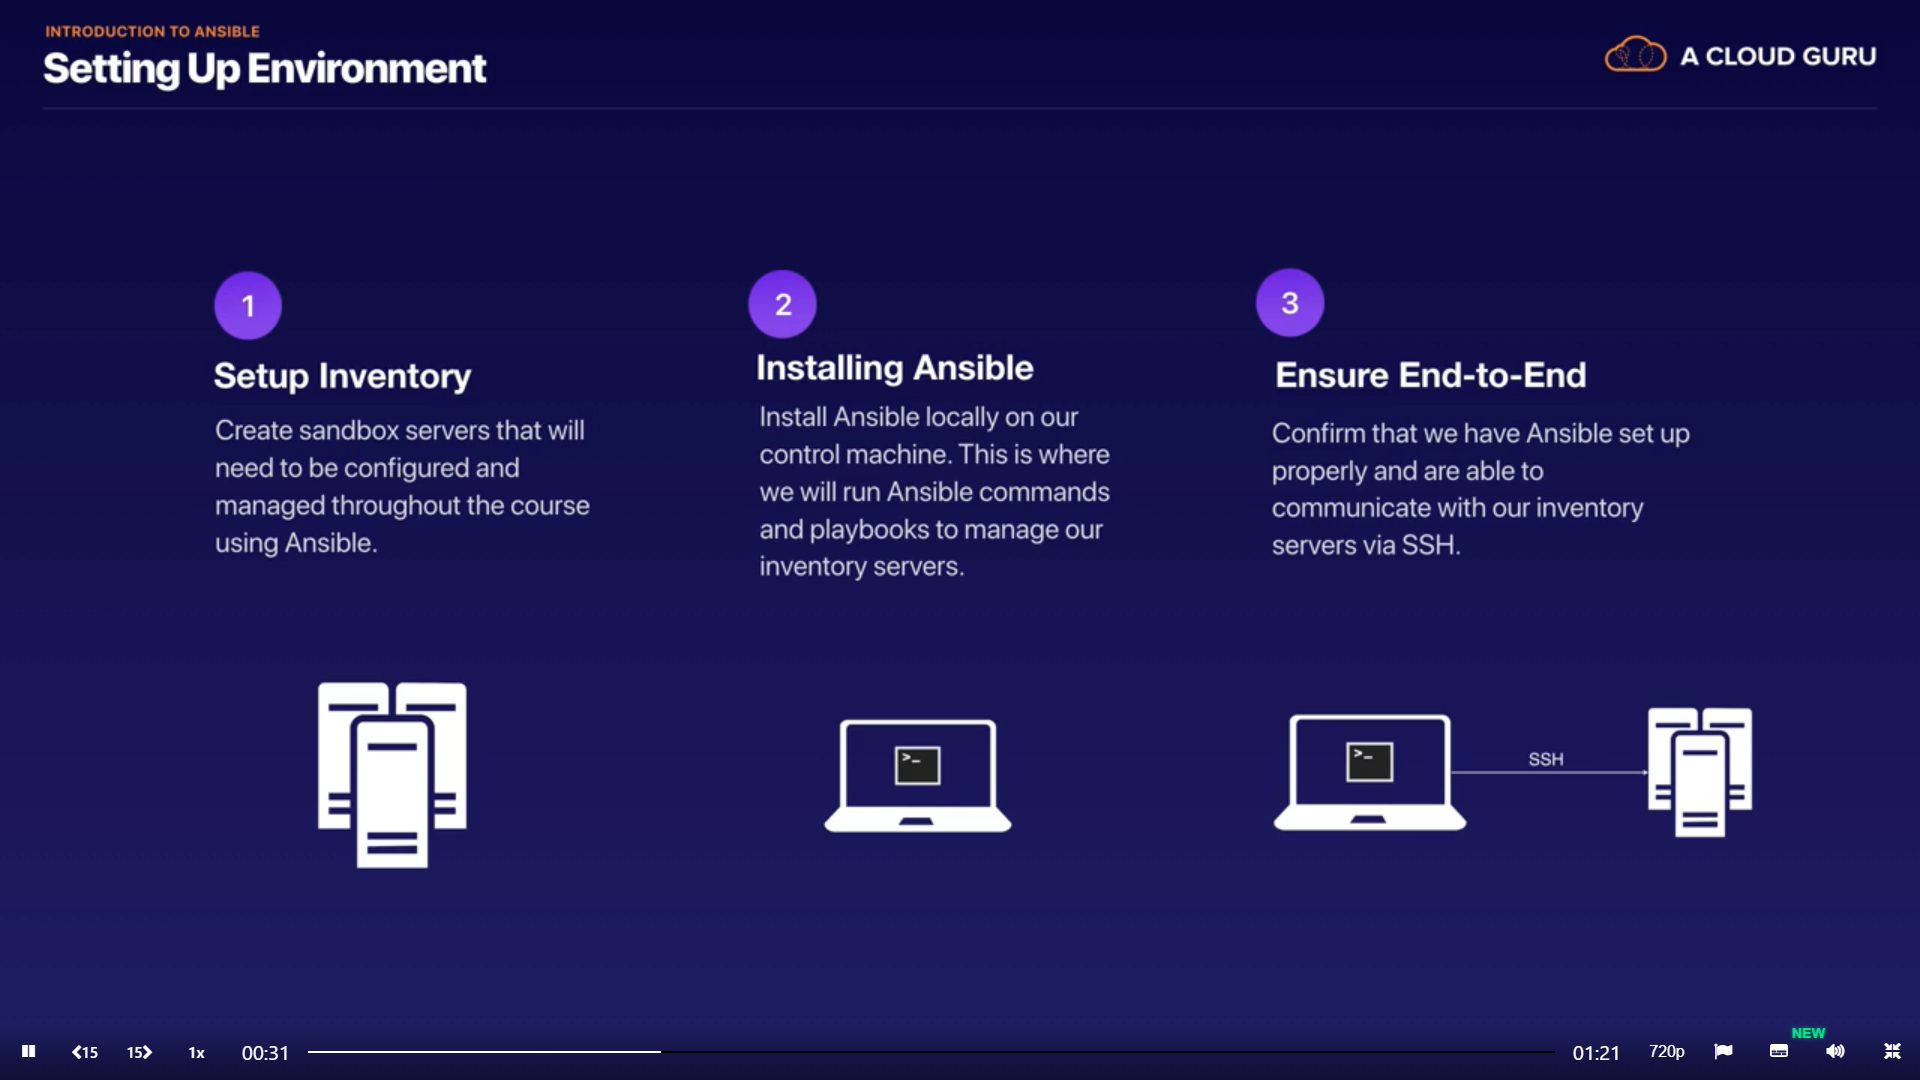
Environment settings
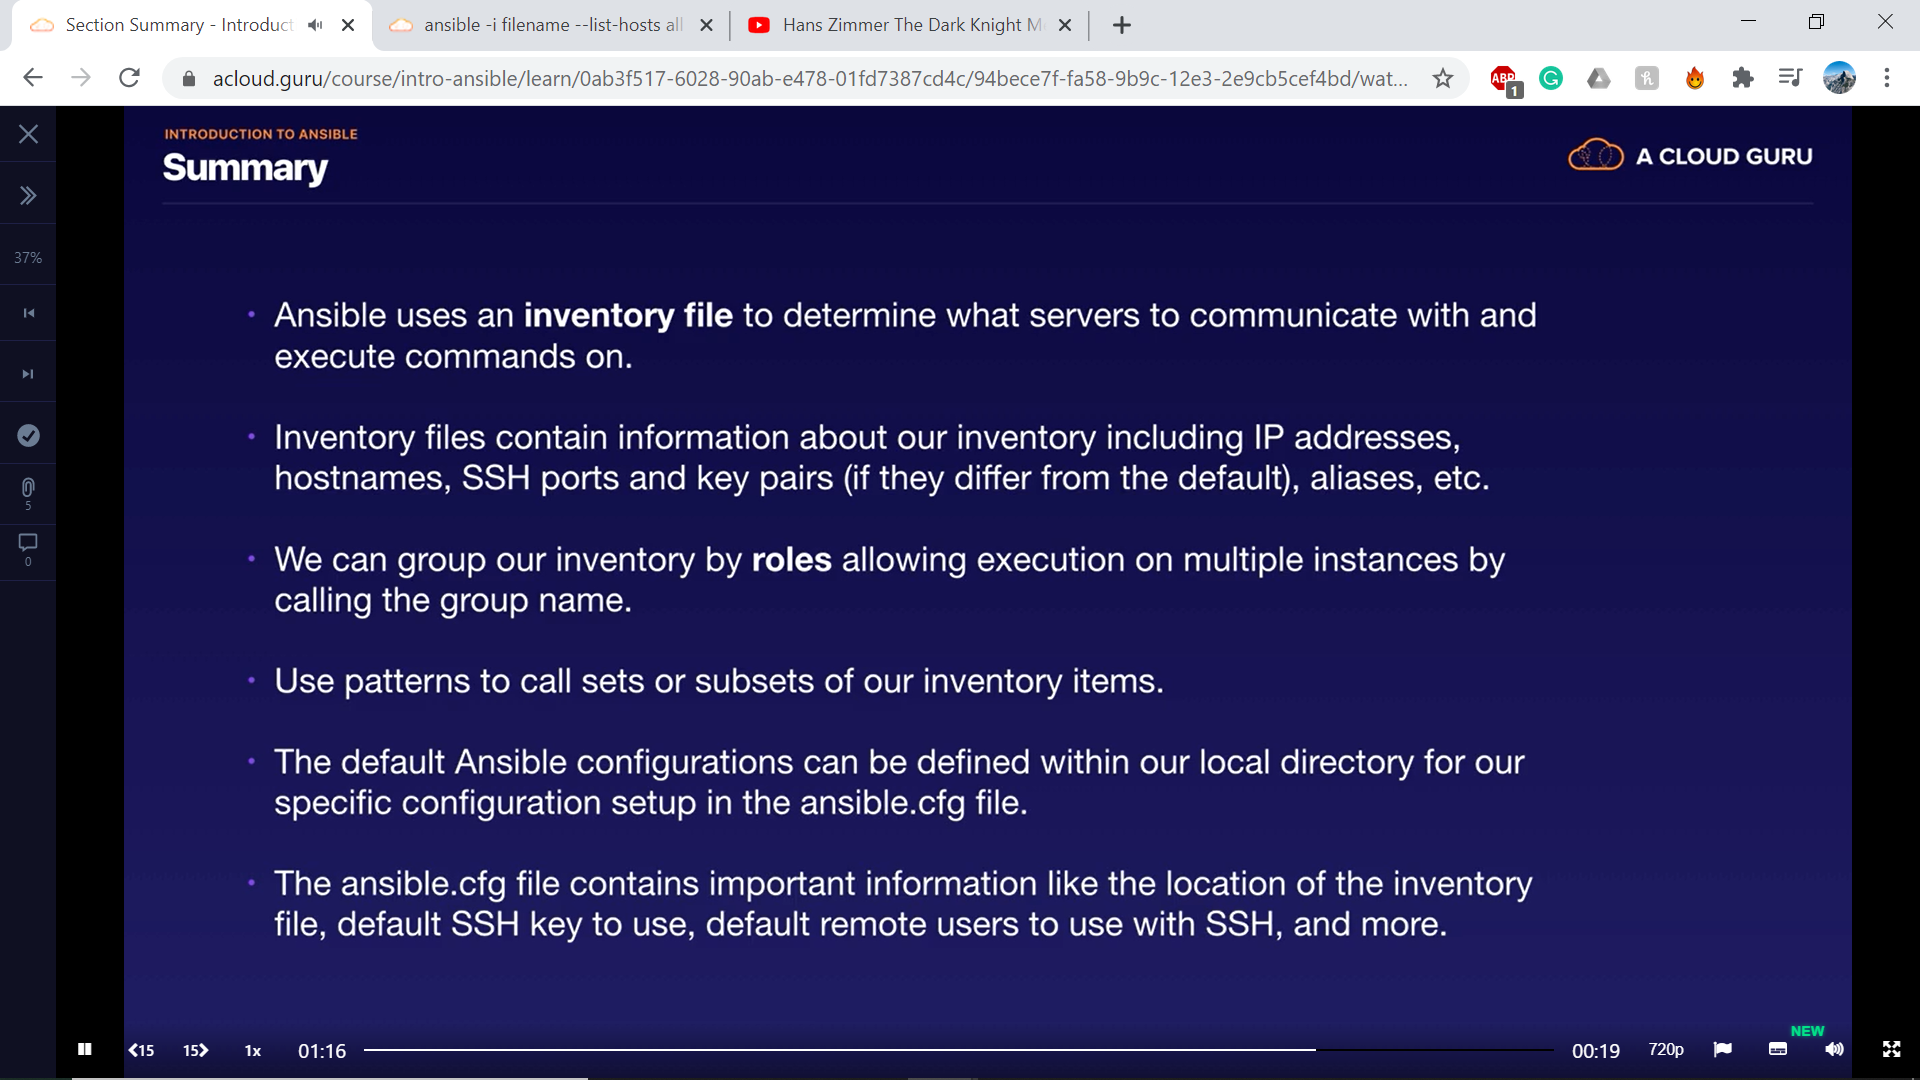
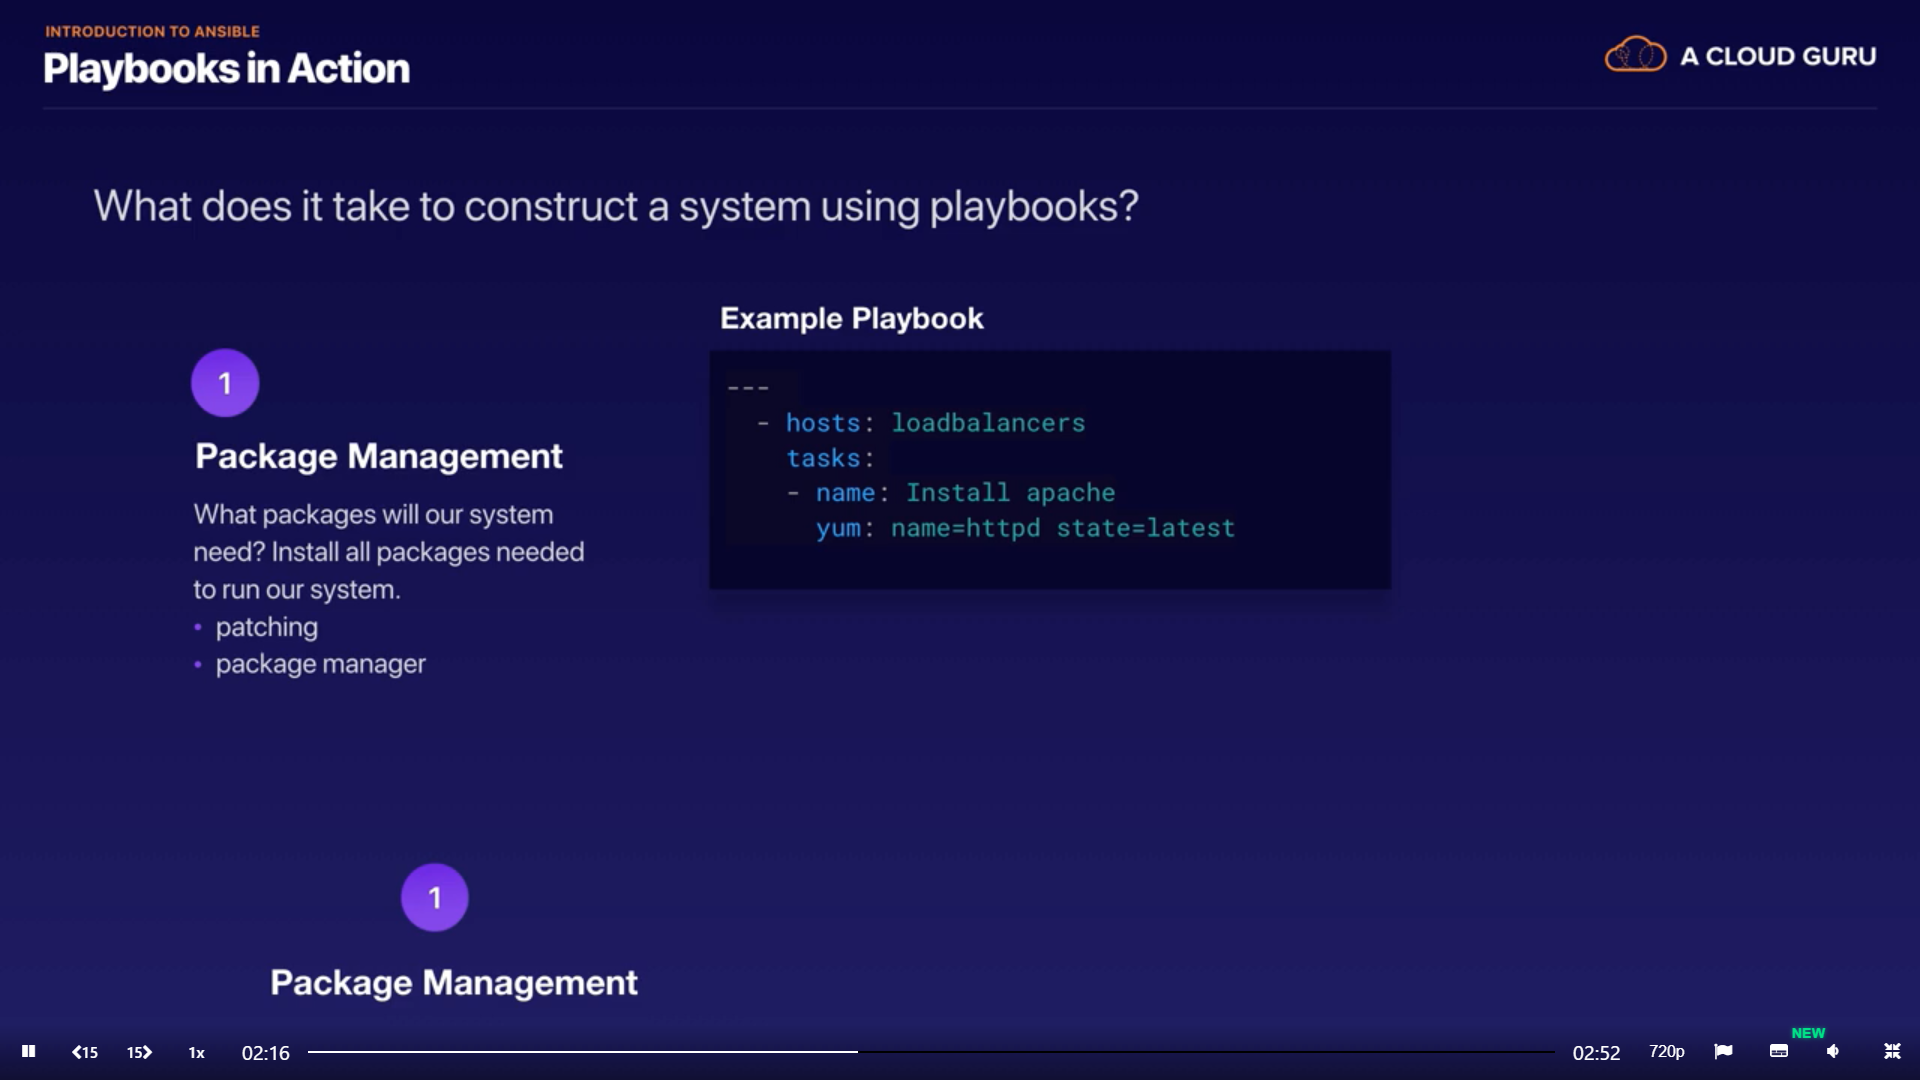
Construct a system using Playbooks
- Package management
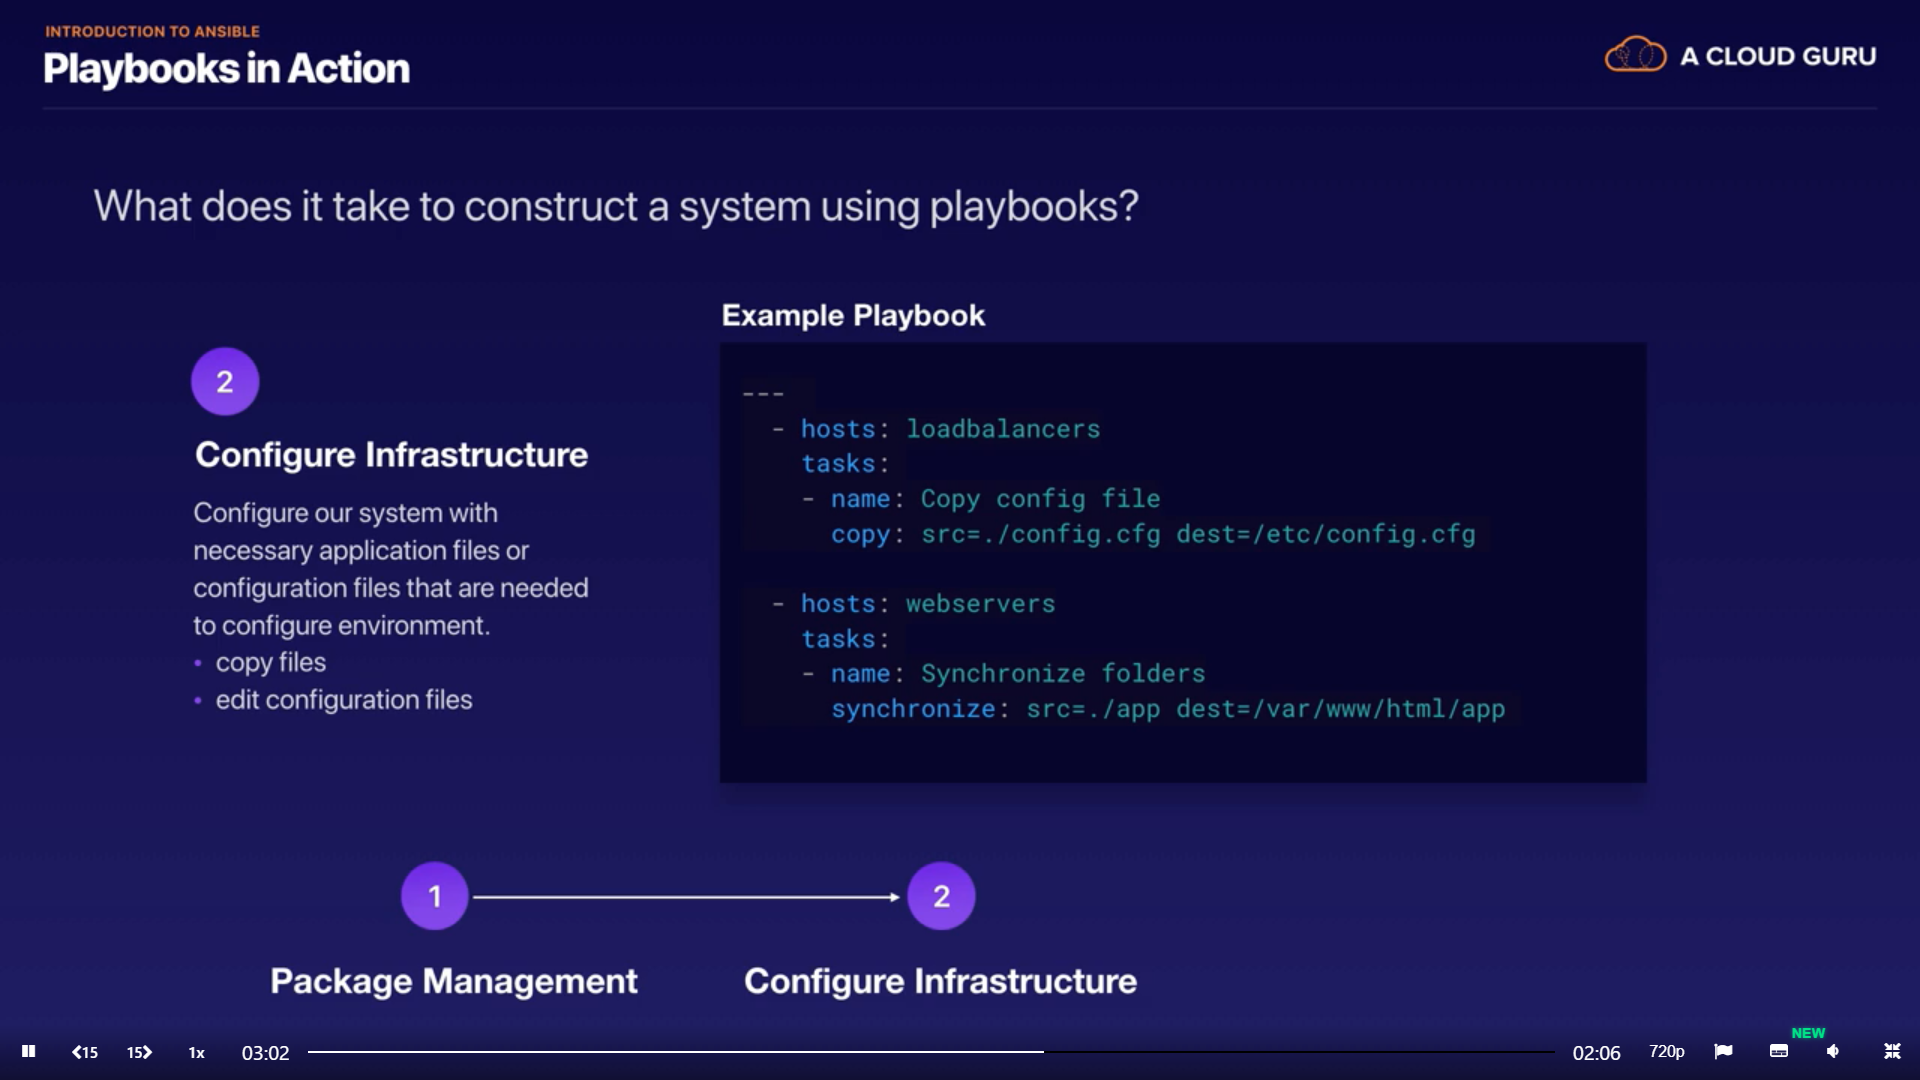
- Configure infrastructure
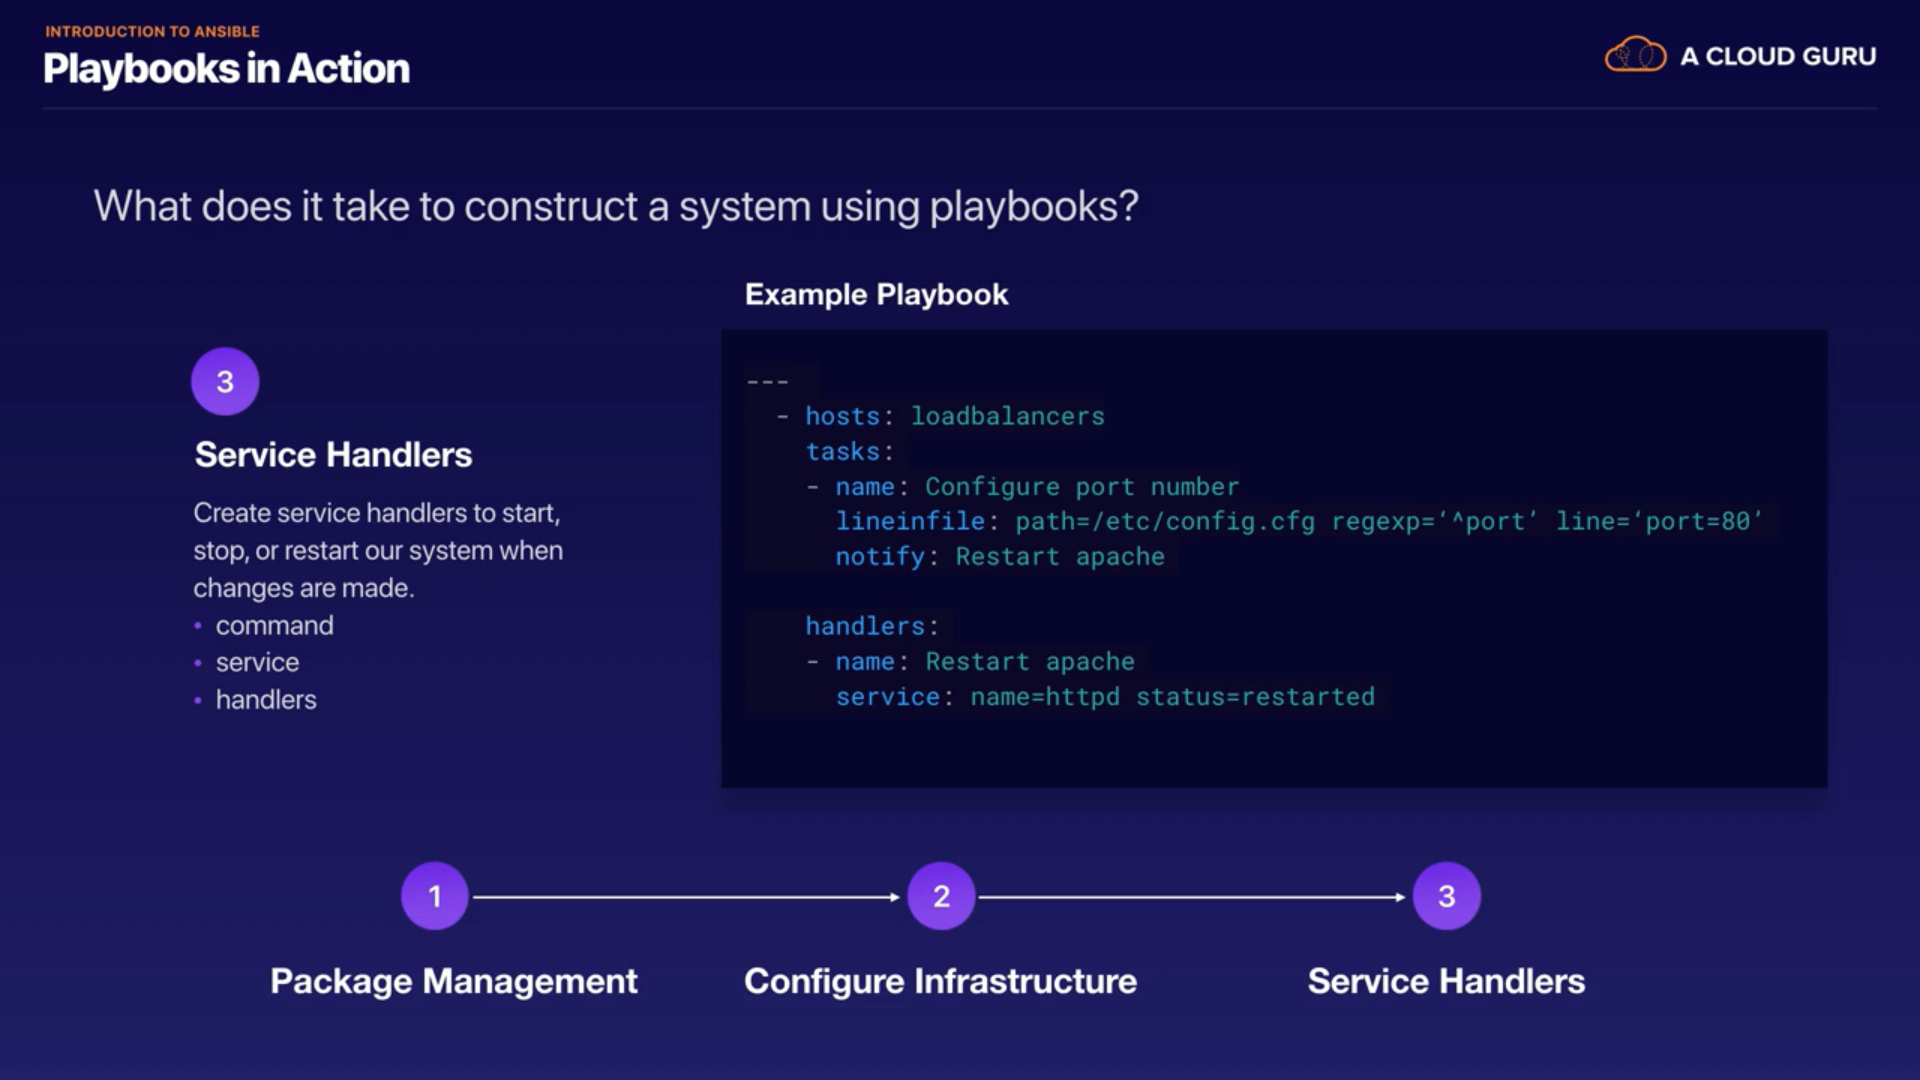
- Service handler
Test configuring a system

Link and Tools:
- Ansible Youtube Series: https://www.youtube.com/playlist?list=PLT98CRl2KxKEUHie1m24-wkyHpEsa4Y70
- Tmux Tool: to switch to different servers via multiple terminal
1. Ansible
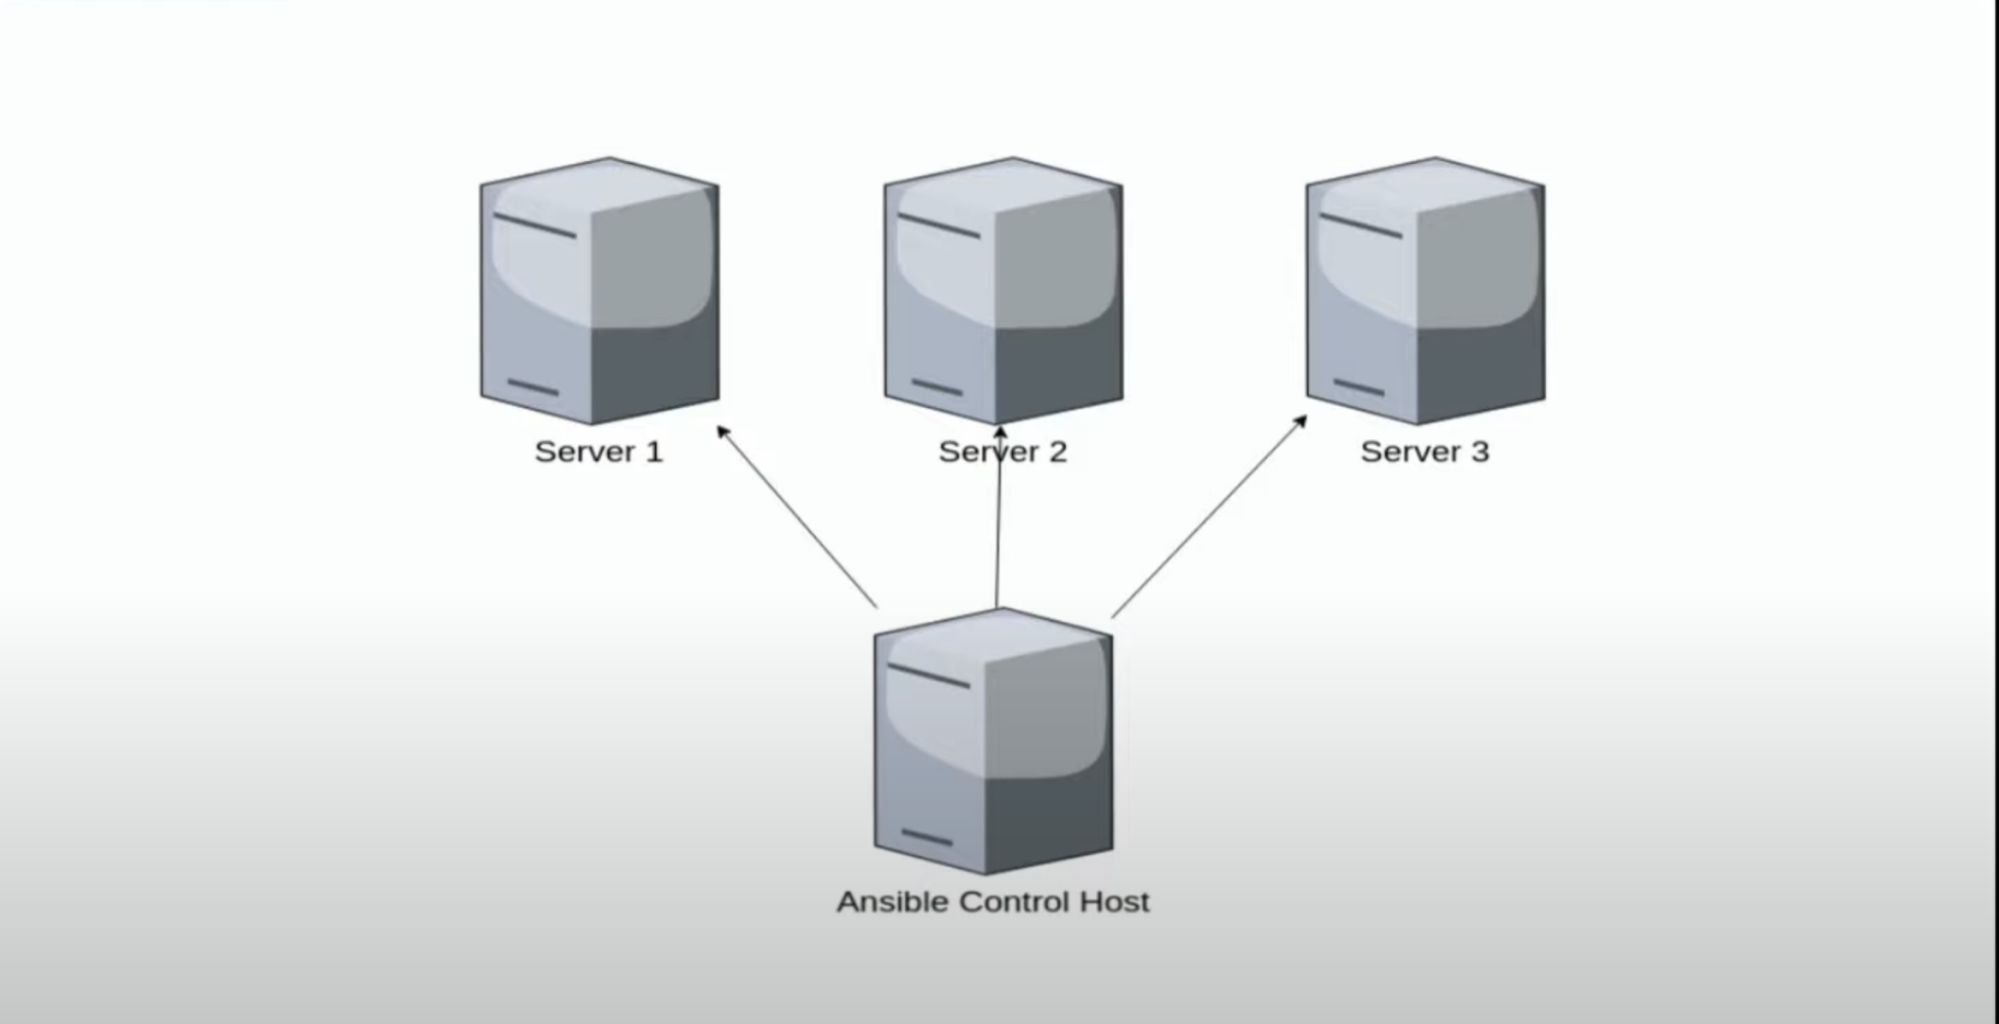
What: software/tool to provision servers
How: this control host(can be a remote server or your laptop/workstation) containing script/Ansible Playbook, which runs to provision code/package to your servers
2. SSH
What: to connect/authenticate to your servers
How: ssh@IP
Auth
- You either prompted to password // pw is default
- Or SSH key // then you won’t be prompted to pw
- This is more secure and recommended
- Why: This bypasses entering your password. Or if your password is weak, then it’s easy for someone to break in unless you have the key, then it’s very difficult to break in.
- It asks you to enter a passphrase which is a separate password you can set along with the key
Why OpenSSH
- It's a prerequisite: Ansible uses OpenSSH to connect to servers
- You need SSH Client // Linux has SSH Client by default
sudo apt install openssh-server |
Setup Guide
- You have your Ansible server/laptop and fleet of servers/hosts
- Install OpenSSH to connect to remote servers
- Make a connection from your Ansible server/laptop to your servers. Answer yes to the initial connection prompt
- Optional(but do it anyway): Create SSH key pair with a passphrase for your normal user account
- What: this is the key for your remote server. So that you can access it without a password
- Usage: use this key to connect to servers and do manual activity
- Check what ssh file you have before creating key ls -la .ssh
ssh-keygen -t ed25519 -C "gautam default" |
- Give path where you want to save key: can be home directory
- Enter passphrase: enter password
- What: adding a passphrase to your key will going to ask for your key everytime you use it
- Why: to make key much more secure
- Issue: it will ask for this passphrase/password when you try to connect to server
- Solution: We will later cache this passphrase
- End: This will create 2 key; 1 public and 1 private key
- Commands:
- -t = type
- -C = Comment, gives you metadata of key
- Copy this key to your fleet of servers
- Why: placing this key to a remote server, so that we can use above-generated key to connect to our servers
- End: This key will be copied to remote server //check by ls -la .ssh
- From your laptop execute below command
ssh-copy-id -i ~/.ssh/id_ed25519.pub Server_IP |
- -i = input
- This will ask remote server password
- Optional: Test connectivity
- This will ask you to enter the passphrase associated with the key you setup on step-4
- Create an SSH key specific to Ansible
- Location: Give path where you want to save key: don’t give path where you saved your step-4 SSH key. Ansible key will overwrite Step-4 key otherwise.
- Usage: this key is for Ansible, so it can provision servers
- IMP: This key must be kept secure because it is very powerful
/home/gautam/.ssh/ansible |
- Enter passphrase: don’t enter a password. Press enter
- Why: this will make ansible automatically do the task without entering the passphrase
ssh-keygen -t ed25519 -C "ansible" |
- Copy/Add this key to your fleet of servers
- Enter passphrase: enter step-4 passphrase
- What: This will ask us to enter the original key(step-4) that it will use to facilitate copying the new key over to the server
- From your laptop, execute below command
shh-copy-id -i ~/.ssh/ansible.pub Server_IP |
- Once all the key has been added to remote servers, Use the ansible key from your workstation/laptop to connect to a remote server
- What: use ansible key so that way you tell which key you want to use for the connection
- This is the command you will use when you want to connect to a server
- This won’t ask you to enter the passphrase
ssh -i ~/.ssh/ansible Server_IP # This uses ansible ssh key ssh Server_IP # This uses original key on step-4. So will ask you to enter pw |
- Issue: when you want to connect to server using ansible key, you have to type -i ~/.ssh/ansible
- Use SSH agent to cache passphrase of general login(not ansible login).
What: So you don’t have to enter passphrase everytime when you want to connect to a remote server against your general user key
- ssh-add: enter a passphrase(step-4)
- This will return PID of SSH agent which runs in the background // ps aux | grep PID
eval $(ssh-agent) ssh-add // to cache key so that you don’t have to enter passphrase
ssh Server_IP // You won’t need to enter passphrase |
Caveat: This is not permanent. If you were to close the terminal, then you have to enter the passphrase again because that SSH agent is not running when you close terminal
- Use SSH agent alias to shorten the commands
- Now type ssha so that you don’t have to write step-10 commands
alias ssha='eval $(ssh-agent) && ssh-add' |
- Add alias to the .bashrc file
- Why: This will cache the alias. So that you don’t have to type commands on step-10
- Because if you close your terminal you also lose alias so that’s why we need to add it to .bashrc file
nano .bashrc
# ssh agent
alias ssha='eval $(ssh-agent) && ssh-add' |
Now just run
ssh Server_IP // to connect to server ssha // type shha and enter passphrase and it will be cached by ssh agent |
3. Git Repo
- Create GitHub repo
- On that repo, Delete the default ssh key on github
- Settings → SSH and GPG keys
- Create a new ssh key and add an original public ssh key you created on step-4 to github account
- Clone repo with SSH
4. Running AD-HOC commands
What: run AD-HOC command against all the server/hosts by running one command to execute all the servers
- Install Ansible on your workstation/laptop
sudo apt update
sudo apt install ansible |
- Create inventory file
- This file contains remote server’s IP address we want to manage with ansible
nano inventory
198.12.23.4 // List IP address or DNS name 198.12.23.5 |
- Connect and establish a connection to remote servers by ansible from your laptop
- --key-file = give this key file for ansible to use to connect to servers
- -i = inventory of severe’s IP address
ansible all --key-file ~/.ssh/ansible -i inventory -m ping |
- Create an ansible config file to shorten step-3
- This file will read by ansible
Nano ansible.cfg [defaults]
inventory = inventory
private_key_file = ~/.ssh/ansible
ansible all -m ping |
Troubleshoot Commands
ansible all -m gather_facts ansible all -m gather_facts --limit Host_IP | Gives all the info about remote servers/host Gives all the info about host IP you specified IMP: this will only show you server info but won’t update the server |
5. Running elevated ad-hoc Commands
What: command that makes changes to the server
- The above command is just there to see details about all servers. It doesn’t make any changes to server, such as, update/install packages
How:
- By executing ansible all with modules, it will update all the servers by just one command
- If the packages are already there, then it won’t update existing ones// rely on state. Like terraform
Ansible sudo
- Make ansible use sudo of its own: --become --ask-become-pass
- Become password: enter sudo password // user account password
- Why: to execute anything on linux system you need sudo. By typing --become --ask-become-pass we let ansible to use sudo to execute command
Link: https://www.learnlinux.tv/getting-started-with-ansible-05-running-elevated-commands/
ansible all -m apt -a update_cache=true --become --ask-become-pass | Same thing as “sudo apt update”: to update package on servers -m = module -a = argument to that module update_cache=true: Same thing as “sudo apt update” --become --ask-become-pass: elevate privileges by default to use sudo & use sudo password Tell ansible to use sudo (become) Enter become pw: enter user password |
ansible all -m apt -a name=vim-nox --become --ask-become-pass | Install a VIM package via the apt module |
ansible all -m apt -a "name=snapd state=latest" --become --ask-become-pass | Install a package via the apt module, and also make sure it’s the latest version available |
ansible all -m apt -a upgrade=dist --become --ask-become-passxx | Upgrade all the package updates that are available |
6. Ansible Playbook
What:
- Provision your servers with modules and packages in declarative style in YAML syntax, instead of typing above commands all the time when you want to update/create your packages
- when we write playbook, we can define the state that we want our servers to be in with command, and the plays/commands that ansible will carry out to bring our servers to in that stage
- Create a playbook file
nano install_apache.yml # To create an ansible file
---
- hosts: all
become: true
tasks:
- name: update repository index apt: update_cache: yes - name: install apache2 package apt: name: apache2 state: latest - name: add php support for apache apt: name: libapache2-mod-php state: latest |
Command for running Ansible Playbook
ansible-playbook --ask-become-pass File_Name | Run this command to execute ansible file |
7. Condition - When
Usage: when you want to have a different flavor of Linux distribution; Ubuntu, Debian, Mint
- Handle multi-distribution linux shop
Example: you have 3 servers on Ubuntu and now added CentOS server. This way, you also need to modify the existing YAML playbook. Because modules that support in Ubuntu don’t support CentOS. Use When to distinguish servers distribution
---
- hosts: all
become: true
tasks:
- name: update repository index
apt:
update_cache: yes
when: ansible_distribution == "Ubuntu"
- name: install apache2 package
apt:
name: apache2
state: latest
when: ansible_distribution == "Ubuntu"
- name: add php support for apache
apt:
name: libapache2-mod-php
state: latest
when: ansible_distribution == "Ubuntu"
- name: update repository index
dnf:
update_cache: yes
when: ansible_distribution == "CentOS"
- name: install httpd package
dnf:
name: httpd
state: latest
when: ansible_distribution == "CentOS"
- name: add php support for apache
dnf:
name: php
state: latest
when: ansible_distribution == "CentOS" |
8. Improving your Playbook
What: reorganize playbook to make your playbook clean and less messy
- This makes efficient and easy to read the playbook code.
Consolidating
What: consolidate your code by having multiple packages inside single task(name entry) instead of having separate tasks(name entries per package)
---
- hosts: all
become: true
tasks:
- name: install apache2 package
apt:
name:
- apache2
- libapache2-mod-php
state: latest
update_cache: yes
when: ansible_distribution == "Ubuntu"
- name: install httpd package
dnf:
name:
- httpd
- php
state: latest
update_cache: yes
when: ansible_distribution == "CentOS" |
Consolidating-2
---
- hosts: all
become: true
tasks:
- name: install apache and php
package:
name:
- "Template:Apache package"
- "Template:Php package"
state: latest
update_cache: yes |
inventory file (with host variables added)
172.16.250.132 apache_package=apache2 php_package=libapache2-mod-php
172.16.250.133 apache_package=apache2 php_package=libapache2-mod-php
172.16.250.134 apache_package=apache2 php_package=libapache2-mod-php
172.16.250.248 apache_package=httpd php_package=php |
9. Targeting Specific Nodes
What: segment your servers into groups. As not all servers you want to install apache on to. Because you may have a web server, file server, or database server, and you want to handle them differently.
- So the idea here is to create a group of servers and create a playbook yaml file accordingly
How
- In your Inventory file, create groups
- In the playbook, create a separate host per group you defined in the inventory
Example
---
# Update All Host
- hosts: all # below task we want to execute on all our servers; web,db,file servers
become: true
pre_tasks: # This task always runs first because it's "pre_task"
- name: install updates (CentOS)
dnf:
update_only: yes # Update packages with dnf module
update_cache: yes
when: ansible_distribution == "CentOS"
- name: install updates (Ubuntu)
apt:
upgrade: dist # Update packages with apt module
update_cache: yes
when: ansible_distribution == "Ubuntu"
# Web server group - install apache
- hosts: web_servers
become: true
tasks:
- name: install apache and php for Ubuntu servers
apt:
name:
- apache2
- libapache2-mod-php
state: latest
when: ansible_distribution == "Ubuntu"
- name: install apache and php for CentOS servers
dnf:
name:
- httpd
- php
state: latest
when: ansible_distribution == "CentOS"
# DB Server group - install mariadb
- hosts: db_servers
become: true
tasks:
- name: install httpd package (CentOS)
dnf:
name: mariadb
state: latest
when: ansible_distribution == "CentOS"
- name: install mariadb server
apt:
name: mariadb-server
state: latest
when: ansible_distribution == "Ubuntu"
# File Server group - install samba package
- hosts: file_servers
become: true
tasks:
- name: install samba package
package:
name: samba
state: latest |
# Update Inventory file with group
[web_servers]
172.16.250.132
172.16.250.248
[db_servers]
172.16.250.133
[file_servers]
172.16.250.134
10. Tags
What: add metadata to our plays so that we can run only the plays we want to test: to make testing easier
Problem solves: earlier when you execute command ansible going to run against all the server your specified in your plays. Now Tags will only run plays which you want to test
Example:
---
# Update All Host
- hosts: all # below task we want to execute on all our servers; web,db,file servers
become: true
pre_tasks: # This task always runs first because it's "pre_task"
- name: install updates (CentOS)
tags: always # I want to run this always and want to patch always
dnf:
update_only: yes # Update packages with dnf module
update_cache: yes
when: ansible_distribution == "CentOS"
- name: install updates (Ubuntu)
tags: always
apt:
upgrade: dist # Update packages with apt module
update_cache: yes
when: ansible_distribution == "Ubuntu"
# Web server group - install apache
- hosts: web_servers
become: true
tasks:
- name: install apache and php for Ubuntu servers
tags: apache,apache2,ubuntu # Name can be anything
apt:
name:
- apache2
- libapache2-mod-php
state: latest
when: ansible_distribution == "Ubuntu"
- name: install apache and php for CentOS servers
tags: apache,centos,httpd
dnf:
name:
- httpd
- php
state: latest
when: ansible_distribution == "CentOS"
# DB Server group - install mariadb
- hosts: db_servers
become: true
tasks:
- name: install httpd package (CentOS)
tags: centos,db,mariadb
dnf:
name: mariadb
state: latest
when: ansible_distribution == "CentOS"
- name: install mariadb server
tags: db,mariadb,ubuntu
apt:
name: mariadb-server
state: latest
when: ansible_distribution == "Ubuntu"
# File Server group - install samba package
- hosts: file_servers
tags: samba
become: true
tasks:
- name: install samba package
tags: samba
package:
name: samba
state: latest
How to run
ansible-playbook --list-tags site. yml | List the available tags |
ansible-playbook --tags db --ask-become-pass site_with_tags.yml
ansible-playbook --tags centos --ask-become-pass site_with_tags.yml
ansible-playbook --tags apache --ask-become-pass site_with_tags.yml
| Running a playbook targeting specific tags |
ansible-playbook --tags “db,apache” --ask-become-pass site_with_tags.yml | Running a playbook targeting multiple tags |
11. Managing Files
What: until now, we only worked with updating/creating packages. But what if we want to modify files, such as copying files from the code base to the server
Usage:
- Copy files to servers(html,script)
Why/Use case
- Customize default website
- Copy files to a server(html,script)
- Install terraform
# Install terraform
- hosts: workstations
become: true
tasks:
- name: install unzip
package:
name: unzip
- name: install terraform
unarchive:
src: https://releases.hashicorp.com/terraform/0.12.28/terraform_0.12.28_linux_amd64.zip
dest: /usr/local/bin
remote_src: yes
mode: 0755
owner: root
group: root
# copy html file for site
- name: copy html file for site
tags: apache,apache,apache2,httpd
copy:
src: default_site.html
dest: /var/www/html/index.html
owner: root
group: root
mode: 0644
12. Managing Services
What:
- Start and enable httpd: When you install Apache on CentOS servers that include service, it most often won’t be started automatically; they leave that up to you, so you wanna make sure that Apache is running after we install it
- Steps
- Install apache on CentOS
- Start apache
- Enable apache // for some reason; If the web server is rebooted/disabled, then you have to enable it
- Restart apache // let’s say you change the configuration file, and this change requires a service to be restarted after you make the change
- Before this, we also need one change in the config file so that we can test this and restart the web server
- If the server gets rebooted, then the service will not start. So Apache Will not be running.
Usage:
- Start/Restart service
How
- Using service module: Use the service module when you want to automatically start the apache server after it's installation on CentOS
# Start Apache service after it's installation on CentOS
# When you install Apache on CentOS servers that includes a service, it most often won’t be started automatically, they leave that up to you so you wanna make sure that Apache is running after we install it
- name: start and enable httpd (CentOS)
tags: apache,centos,httpd
service: # Use service module when you want to automatically start the apache server after it's installation on CentOS
name: httpd
state: started
enabled: yes # If the server gets rebooted, then the service will not start. So Apache Will not be running
when: ansible_distribution == "CentOS"
- Change e-mail address for admin: let’s say you change the configuration file, and this change requires a service to be restarted after you make the change
- line in file module: This will allow you to change the lines in files to test this change
- Restart httpd (CentOS)
# Change file content in order for Ansible to restart the service
- name: change e-mail address for admin
tags: apache,centos,httpd
lineinfile:
path: /etc/httpd/conf/httpd.conf
regexp: '^ServerAdmin' # Tells to find line that starts with ServerAdmin
line: ServerAdmin somebody@somewhere.net # Tells to replace the line(above) with ServerAdmin somebody@somewhere.net
when: ansible_distribution == "CentOS"
register: httpd # register its state in a variable named "httpd" # name can be anything
- name: restart httpd (CentOS)
tags: apache,centos,httpd
service:
name: httpd
state: restarted
when: httpd.changed # only restart the service if the variable "httpd" state is changed
13. Adding Users & Bootstrapping
Usage
- Create users on all servers
- Configure this user to be our Ansible user that runs ansible jobs in the background. Because we want to be fully automated // this is beginning
- hosts: all
become: true
tasks:
- name: create simone user
tags: always
user:
name: simone
groups: root |
- Add Ansible ssh key file for this user
- Add your ansible public key
- Why: We want to allow the administrator who has access to this key to be able to login as Simone without a password or passphrase
- name: add ssh key for simone
tags: always
authorized_key:
user: simone
key: "ssh-ed25519 AAAAC3NzaC1lZDI1NTE5AAAAIAe7/ofWLNBq3+fRn3UmgAizdicLs9vcS4Oj8VSOD1S/ ansible" |
- Add sudoers file // to make this user more useful
- Once Simon is running, we want her to be able to use Sudo without a password.
- so We need to create a file and copy that file to servers /etc/sudoers.d/simon directly
- So that we are able to control access to Sudo by just adding or removing a file, so when we copy the Simone file here, it’s going to set Simons permissions for Sudo, and if we want to reward those permissions, we can simply delete the file
- Edit ansible config file
- name: add sudoers file for simone
tags: always
copy:
src: sudoer_simone
dest: /etc/sudoers.d/simone
owner: root
group: root
mode: 0440 |
inventory = inventory
private_key_file = ~/.ssh/ansible
remote_user = simon # Because we want to run playbook as user Simon |
Result
- You’ll be able to access any remote server without typing the password
- Add this user to your inventory file
ssh -i ~/.ssh/ansible simone@172.16.250.134 // Test locally
Ansible-playbook site.yml // Run this command that now excluded --ask-become-pass |
ssh -i ~/.ssh/ansible simone@172.16.250.134 | Login to remote server against the user without typing password |
ansible-playbook site.yml | Run this command that now excluded --ask-become-pass |
14. Roles
What: allows us to split up our task better
- To make code cleaner and organized
Example
# Create Users on all server
- hosts: all
become: true
roles:
- base
# Install terraform
- hosts: workstations
become: true
roles:
- workstation
# Web server group - install apache
- hosts: web_servers
become: true
roles:
- web_servers
# DB Server group - install mariadb
- hosts: db_servers
become: true
roles:
- db_servers
# File Server group - install samba package
- hosts: file_servers
tags: samba
become: true
roles:
- file_servers |
mkdir roles mkdir roles/base mkdir roles/workstation mkdir roles/web_servers mkdir roles/db_servers mkdir roles/file_servers
mkdir roles/base/tasks & touch main.yml mkdir roles/workstation/tasks & touch main.yml mkdir roles/web_servers/tasks & touch main.yml mkdir roles/db_servers/tasks & touch main.yml mkdir roles/file_servers/tasks & touch main.yml
mkdir roles/web_servers/files & touch index.html |
15. Host Variables
What:
- Host Variables/groups: allows us to customize how each individual host is handled when we run playbook
- Create host_vars directory: this directory contains the variable
- Go to inventory file
- Create host variable file for each host
mkdir host_vars
cd host_vars
touch 172.16.250.132.yml # This name can be IP, hostname/DNS name of server # Repeat this process for all Host IPs
# Create variable in this file apache_package_name: apache2 apache_service: apache2 php_package_name: libapache2-mod-php |
- Handlers: Sometimes you want a task to run only when a change is made on a machine. For example, you may want to restart a service if a task updates the configuration of that service, but not if the configuration is unchanged. Ansible uses handlers to address this use case. Handlers are tasks that only run when notified.
# Create handler directory mkdir roles/web_servers/handlers & touch main.yml
# move restart task from tasks directory to handlers directory in the web_server folder - name: restart_apache tags: apache,centos,httpd service: name: "{{ apache_service }}" state: restarted
|
What actually
The content of the host_vars yaml files are variables to use in your playbooks. At a basic level it lets you rename a thing and refer to it as a different thing.
The easiest way to understand this is to use it for something you want to change between computers or groups of machines.
For example, in the host_vars YAML file I can make more than just a variable, I can make a whole list.
So you can make one named whatever works for you such as packages or sys_packes as such:
sys_packages: ['curl', 'ufw', 'iotop', 'iftop', 'python 3-pip']
Then in the actual playbooks to install a whole list of software you can reference this such as:
- name: Install packages
apt: name={{ sys_packages }} state= latest
By splitting things up like this you may create as many lists of software for as many machines as you would like. And always install them on every machine using the same Ansible play, but a different host_vars list per host or group.
You can split all sorts of things this way, like users to create or software to install. It's really just a way of letting you use the same plays to create different outcomes by splitting your instruction specifics across more than one file.
16. Templates
What: https://www.learnlinux.tv/getting-started-with-ansible-16-templates/